How to deploy a Drupal Website on Linux with Nginx and Docker
UPDATED AUGUST 2025: Github Repository updated for SSL version and without, and with the new PHP 8.3 Version to support Drupal 11.
Until now, Drupal has been one of the most powerful and flexible content management systems (CMS) available today, used by websites for major enterprises, government agencies, and growing businesses worldwide, like the European Union and the United Nations.
When we need to start deploying Drupal in a new server and avoid performing server installations, like nginx, mysql, etc... we can combine it with Docker containerization and Nginx's reverse-proxy web server to create a robust, scalable, and maintainable infrastructure perfect for modern business applications.
Docker provides a containerization platform that allows applications, including Drupal, to be packaged with their dependencies and configuration settings. This means that the entire Drupal application, along with its dependencies such as Nginx, PHP, and databases, can be encapsulated in a Docker container.
Why is this flexibility important for business applications? Business requirements are constantly evolving, and there is a need for agility in deploying and managing applications.
Drupal, Docker, and Nginx
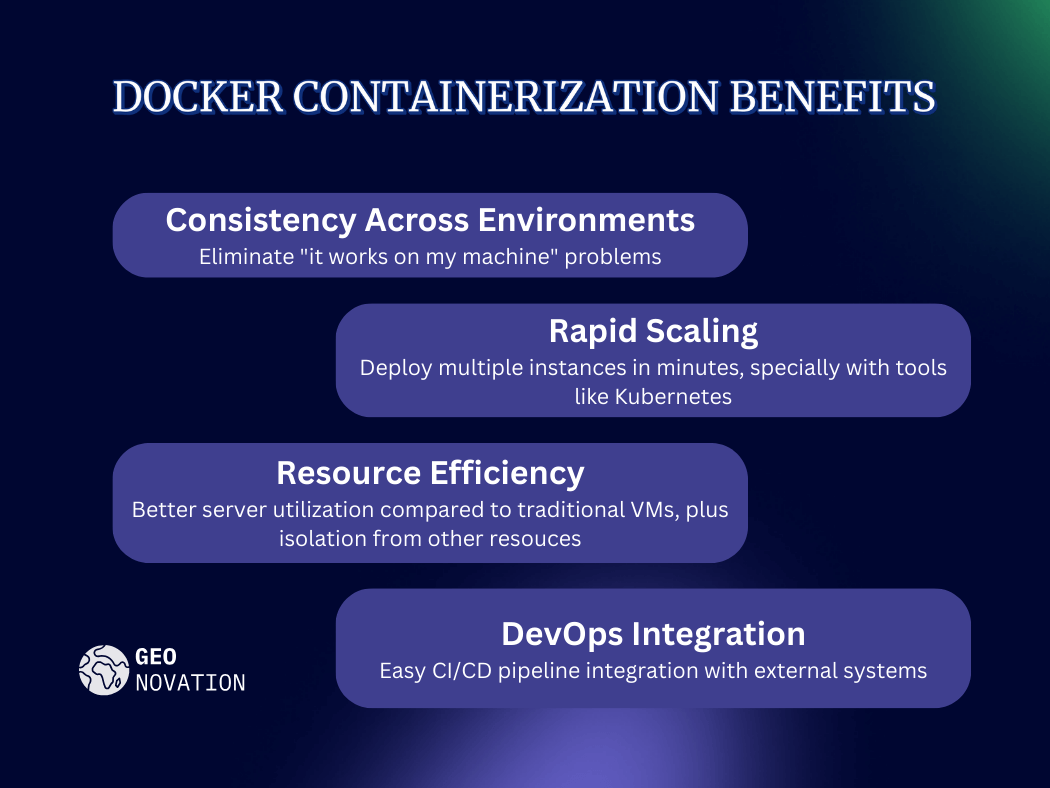
Docker enables businesses to easily deploy and scale Drupal instances across different environments, such as development, staging, and production, while ensuring consistency in the application’s configuration.
Benefits:
- Consistency Across Environments: Eliminate "it works on my machine" problems
- Rapid Scaling: Deploy multiple instances in minutes
- Resource Efficiency: Better server utilization compared to traditional VMs
- DevOps Integration: Seamless CI/CD pipeline integration
Create a Drupal project with Nginx and Docker for the production environment
Having worked with Drupal and Docker and created many environments for GeoNovation customers, I have decided to create a small tutorial with an easy deployment configuration suitable for development and production environments without complicating life with Kubernetes and local installations.
The goal is to create a Drupal instance served by nginx and using php-fpm, ready to be served in a production or staging environment, and easily configurable according to the environment.
All the files of these solutions are available in this public git folder: https://github.com/AndreaCorda01/drupal-docker-boilerplate/

Install and configure Drupal
If you want to create a new Drupal instance, clone the repository and start the system with the command “docker-compose up –build” checking the console to see if everything is starting correctly and the “vendor” folder has been created by Docker.
Follow the readme inside the git folder: https://github.com/AndreaCorda01/drupal-docker-boilerplate/blob/main/README.md#new-project
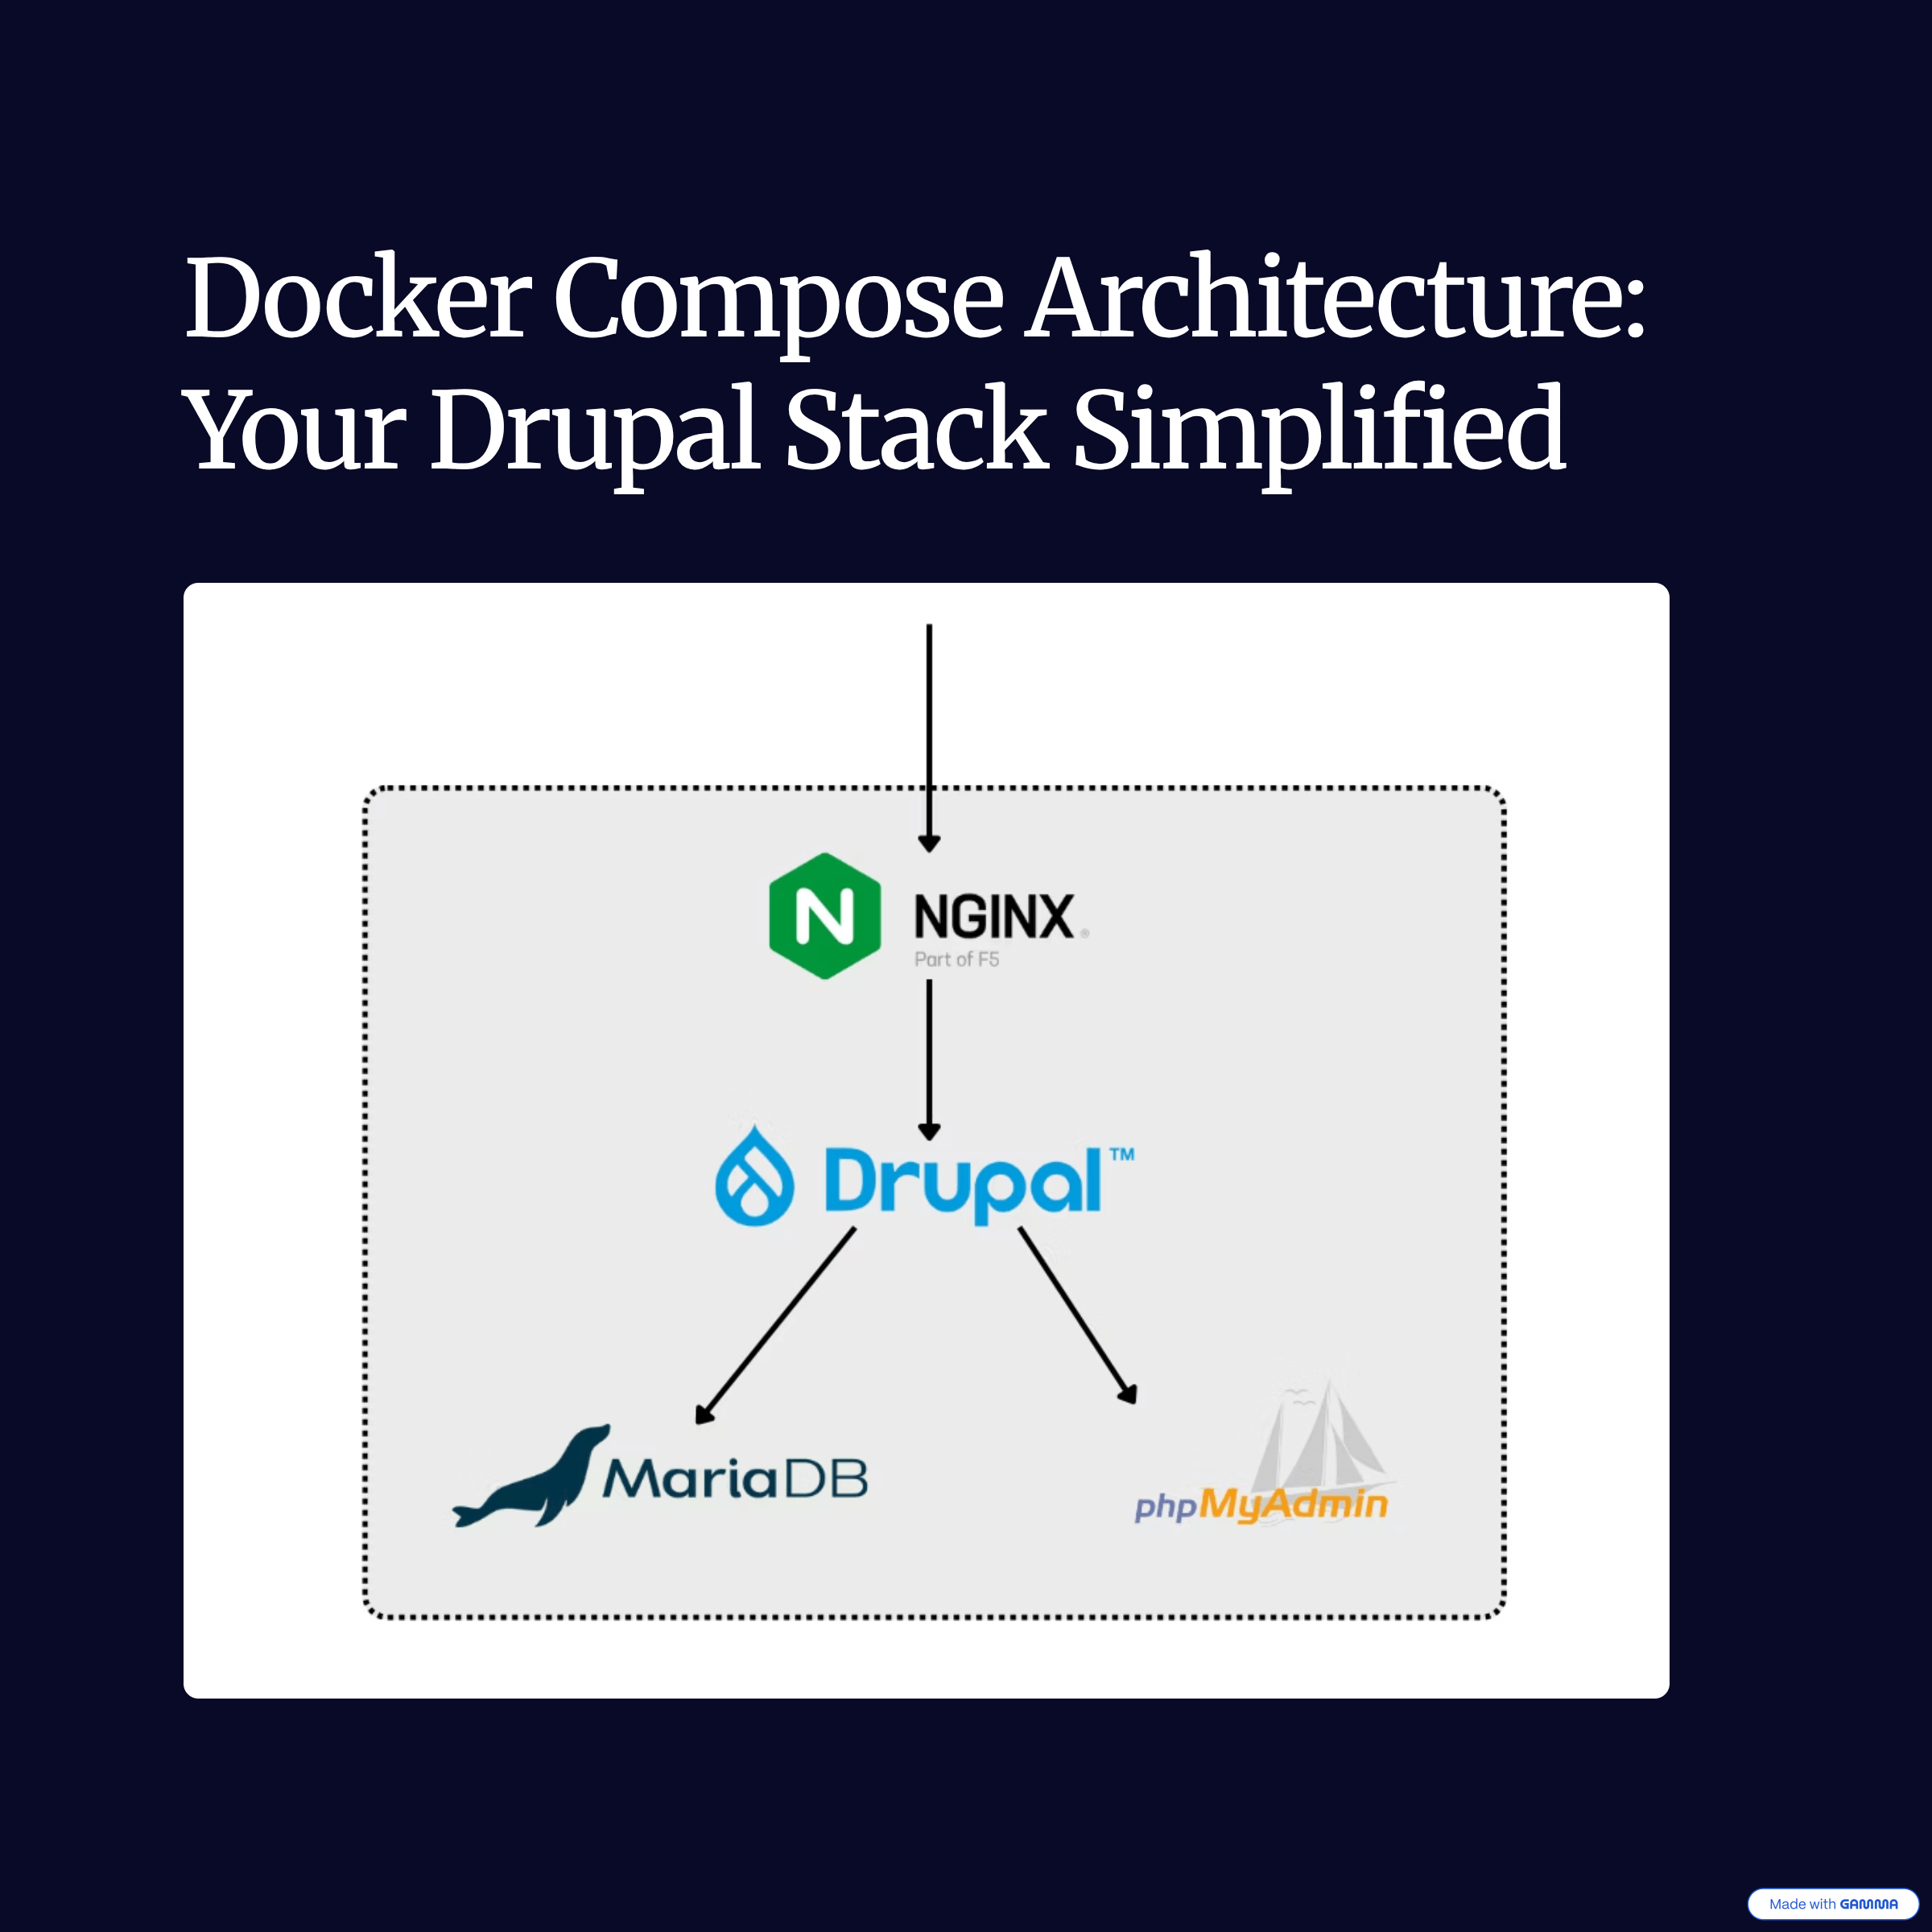
Docker-Compose Architecture: Multi-Container Drupal Stack
Our production-ready setup consists of four interconnected services, each optimized for specific functions:
- Drupal PHP-FPM Container: The Application Core;
- Optimized PHP-FPM Configuration;
- High-Performance Nginx Configuration, including a SSL and no SSL version;
- Complete Docker Compose Configuration;
Nginx Configuration
events {
    worker_connections  1024;
}

http {
    sendfile on;
    tcp_nopush on;
    types_hash_max_size 2048;
    server_tokens off; # Hide Nginx version info
    client_max_body_size 100M;

    include /etc/nginx/mime.types;
    default_type application/octet-stream;

    # Main server block for the website
    #
    server {
        listen 80;
        listen [::]:80;
        server_name www.YOURWEBSITE.org;

        root /var/www/html/web;
        index index.php index.html index.htm;

        # Security headers
        add_header X-Frame-Options "SAMEORIGIN";
        add_header X-Content-Type-Options "nosniff";
        add_header X-XSS-Protection "1; mode=block";

        # Allow Let's Encrypt renewal requests
        location ~* ^/.well-known/acme-challenge/ {
            allow all;
        }

        # Prevent access to sensitive files
        location ~* \.(engine|inc|install|make|module|profile|sh|sql|theme|twig|tpl|xtmpl|yml|ini|log|backup)$ {
            deny all;
            return 404;
        }

        # Block access to private and hidden files
        location ~ (^|/)\. {
            return 403;
        }

        # Block direct access to PHP scripts in certain directories
        location ~ ^/sites/.*/private/ {
            return 403;
        }

        location ~ ^/sites/[^/]+/files/.*\.php$ {
            deny all;
        }

        # PHP processing (Drupal)
        location ~ \.php$ {
            include fastcgi_params;
            fastcgi_pass drupal:9000;
            fastcgi_split_path_info ^(.+\.php)(/.+)$;
            fastcgi_param SCRIPT_FILENAME $document_root$fastcgi_script_name;
            fastcgi_param PATH_INFO $fastcgi_path_info;
            fastcgi_intercept_errors on;

            # Timeout settings
            fastcgi_read_timeout 300;
            fastcgi_send_timeout 300;
            fastcgi_connect_timeout 60;
        }

        # Drupal Clean URLs
        location / {
            try_files $uri /index.php?$query_string;
        }

        # Cache static files
        location ~* \.(js|css|png|jpg|jpeg|gif|ico|svg|woff|woff2|ttf|otf|eot|mp4|webm|ogg|webp)$ {
            expires max;
            log_not_found off;
            add_header Cache-Control "public";
        }

        # Deny access to vendor PHP files (security best practice)
        location ~ /vendor/.*\.php$ {
            deny all;
            return 404;
        }

        # Deny access to Git or SVN repositories
        location ~* /\.(git|svn) {
            deny all;
        }

        # Redirect legacy index.php URLs to clean URLs
        if ($request_uri ~* "^(.*/)index\.php/(.*)") {
            return 307 $1$2;
        }
    }
}
Dockerfile
FROM php:8.3-fpm AS drupal-base

WORKDIR /var/www/html

# Install dependencies
RUN apt-get update && DEBIAN_FRONTEND=noninteractive apt-get install -y --no-install-recommends \
    build-essential \
    libpng-dev \
    libjpeg62-turbo-dev \
    libfreetype6-dev \
    locales \
    libzip-dev \
    zip \
    jpegoptim optipng pngquant gifsicle \
    vim \
    unzip \
    git \
    curl \
    libpq-dev \
    libonig-dev \
    libxml2-dev \
    libmcrypt-dev \
    sendmail \
    sendmail-bin \
    && docker-php-ext-install pdo_mysql zip exif pcntl bcmath gd opcache \
    && docker-php-ext-enable opcache \
    && docker-php-ext-configure gd --with-freetype --with-jpeg \
    && docker-php-ext-install -j$(nproc) gd \
    && apt-get clean && rm -rf /var/lib/apt/lists/*

# Enable sendmail


# Install composer globally
RUN curl -sS https://getcomposer.org/installer | php -- --install-dir=/usr/local/bin --filename=composer


COPY composer.json .

# Install Drush globally
RUN composer require drush/drush
ENV PATH="${PATH}:/var/www/html/vendor/bin"
Explanation of the Docker-Compose structure
The Docker instance is composed of 4 sections:
- web: Provide a Nginx web server as reverse proxy
- Drupal: provide a PHP FM server on which are loaded the php files of drupal
- mysql: Database
- phpmyadmin: ( additional ) to work on the database
Drupal Container with PHP-FPM ( fast_cgi )
A custom Docker image generated from php-8.2-fpm that includes composer and drush cli for Drupal.
This instance is not accessible from outside the docker compose the network.
The default configuration for php-fpm is in the folder nginx/www.conf, which has the display_errors option to Off.
This file must be edited when we install the PHP module opcache to enable Drupal cache.
The php-fpm service runs at the default port 9000
Nginx Server
It Is the HTTP server that sends the content to the user and contains all the security policies to protect the infrastructure.
The current nginx configuration contains different server rules to manage different file types and specific folders contained in Drupal, and it is available to be customized in the file nginx/nginx.conf and contains the specific URI for php-fpm socket in the different docker instance:
fastcgi_pass drupal:9000;
Mysql database
A private database is accessible by Drupal, with a volume assigned to guarantee data persistence.
This database is interchangeable with MariaDB or Postgres, adapting the Drupal configuration in settings.php, just changing the environment variable and the Drupal image
You can change the database_name, username, and password directly on your docker-compose file and then, change your settings.php in Drupal according to your needs.
PhpMyAdmin
Provide a small interface to manipulate the server.
I don’t recommend keeping this instance running once the server is in production, as it is not protected by password, but just for development purposes
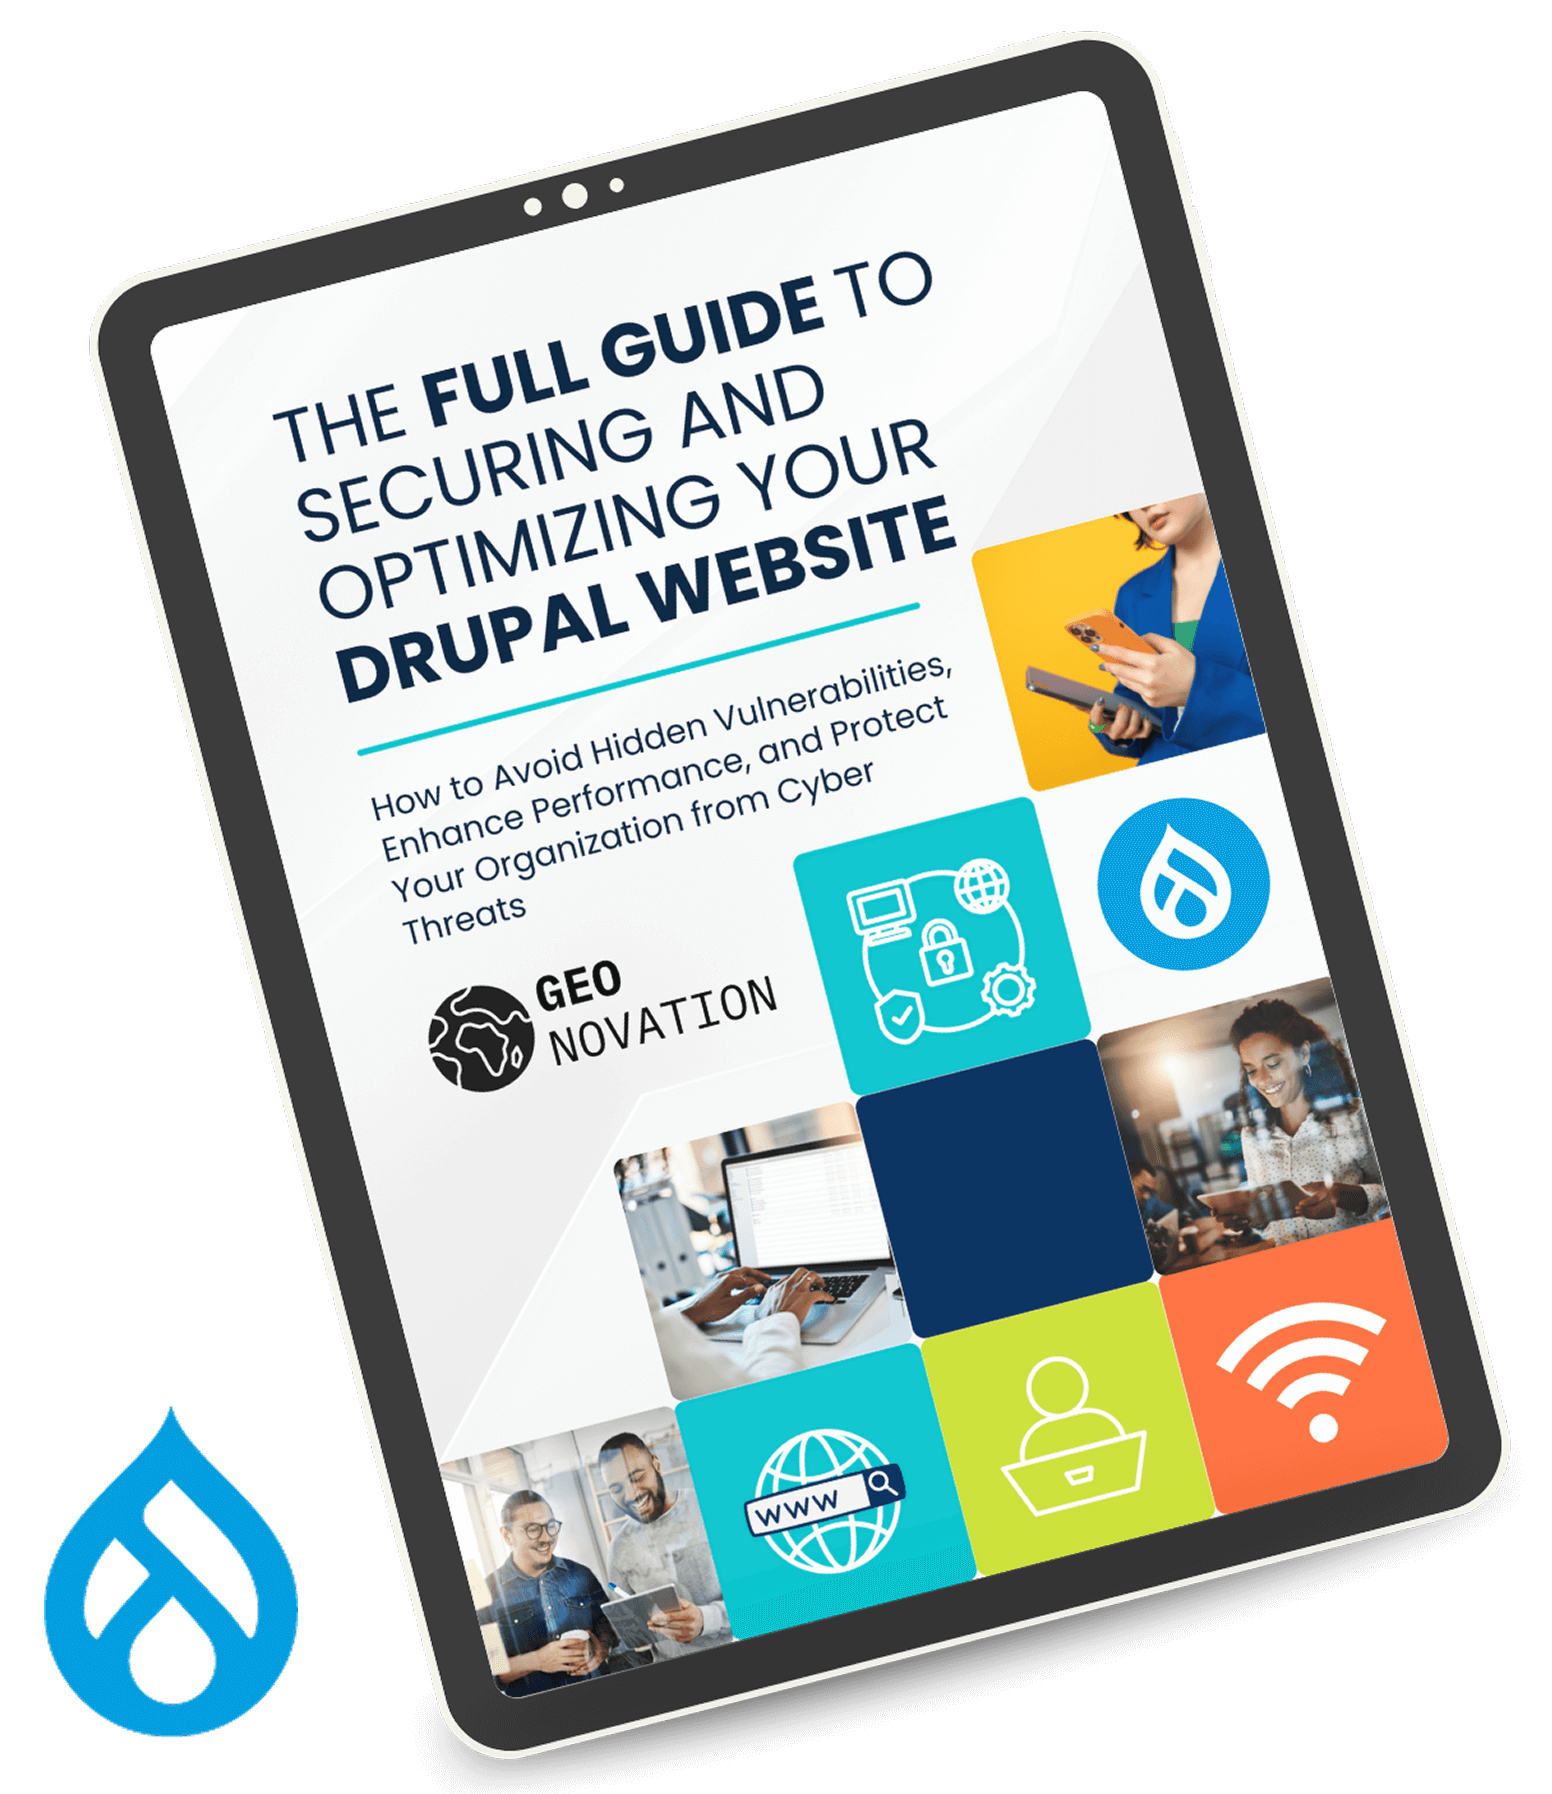
Secure and Supercharge Your Drupal Website
Download our free expert guide to boost performance, eliminate vulnerabilities, and protect your data.
Download the White PaperImprove your environment
To run the application and for basic commands, you can reference the command directly in the README: https://github.com/AndreaCorda01/drupal-docker-boilerplate/blob/main/README.md#usage
With this configuration, you can serve your Drupal application in production on your server, and will be accessible to port 80 of your machine.
SSL Certificate Configuration ( Https )
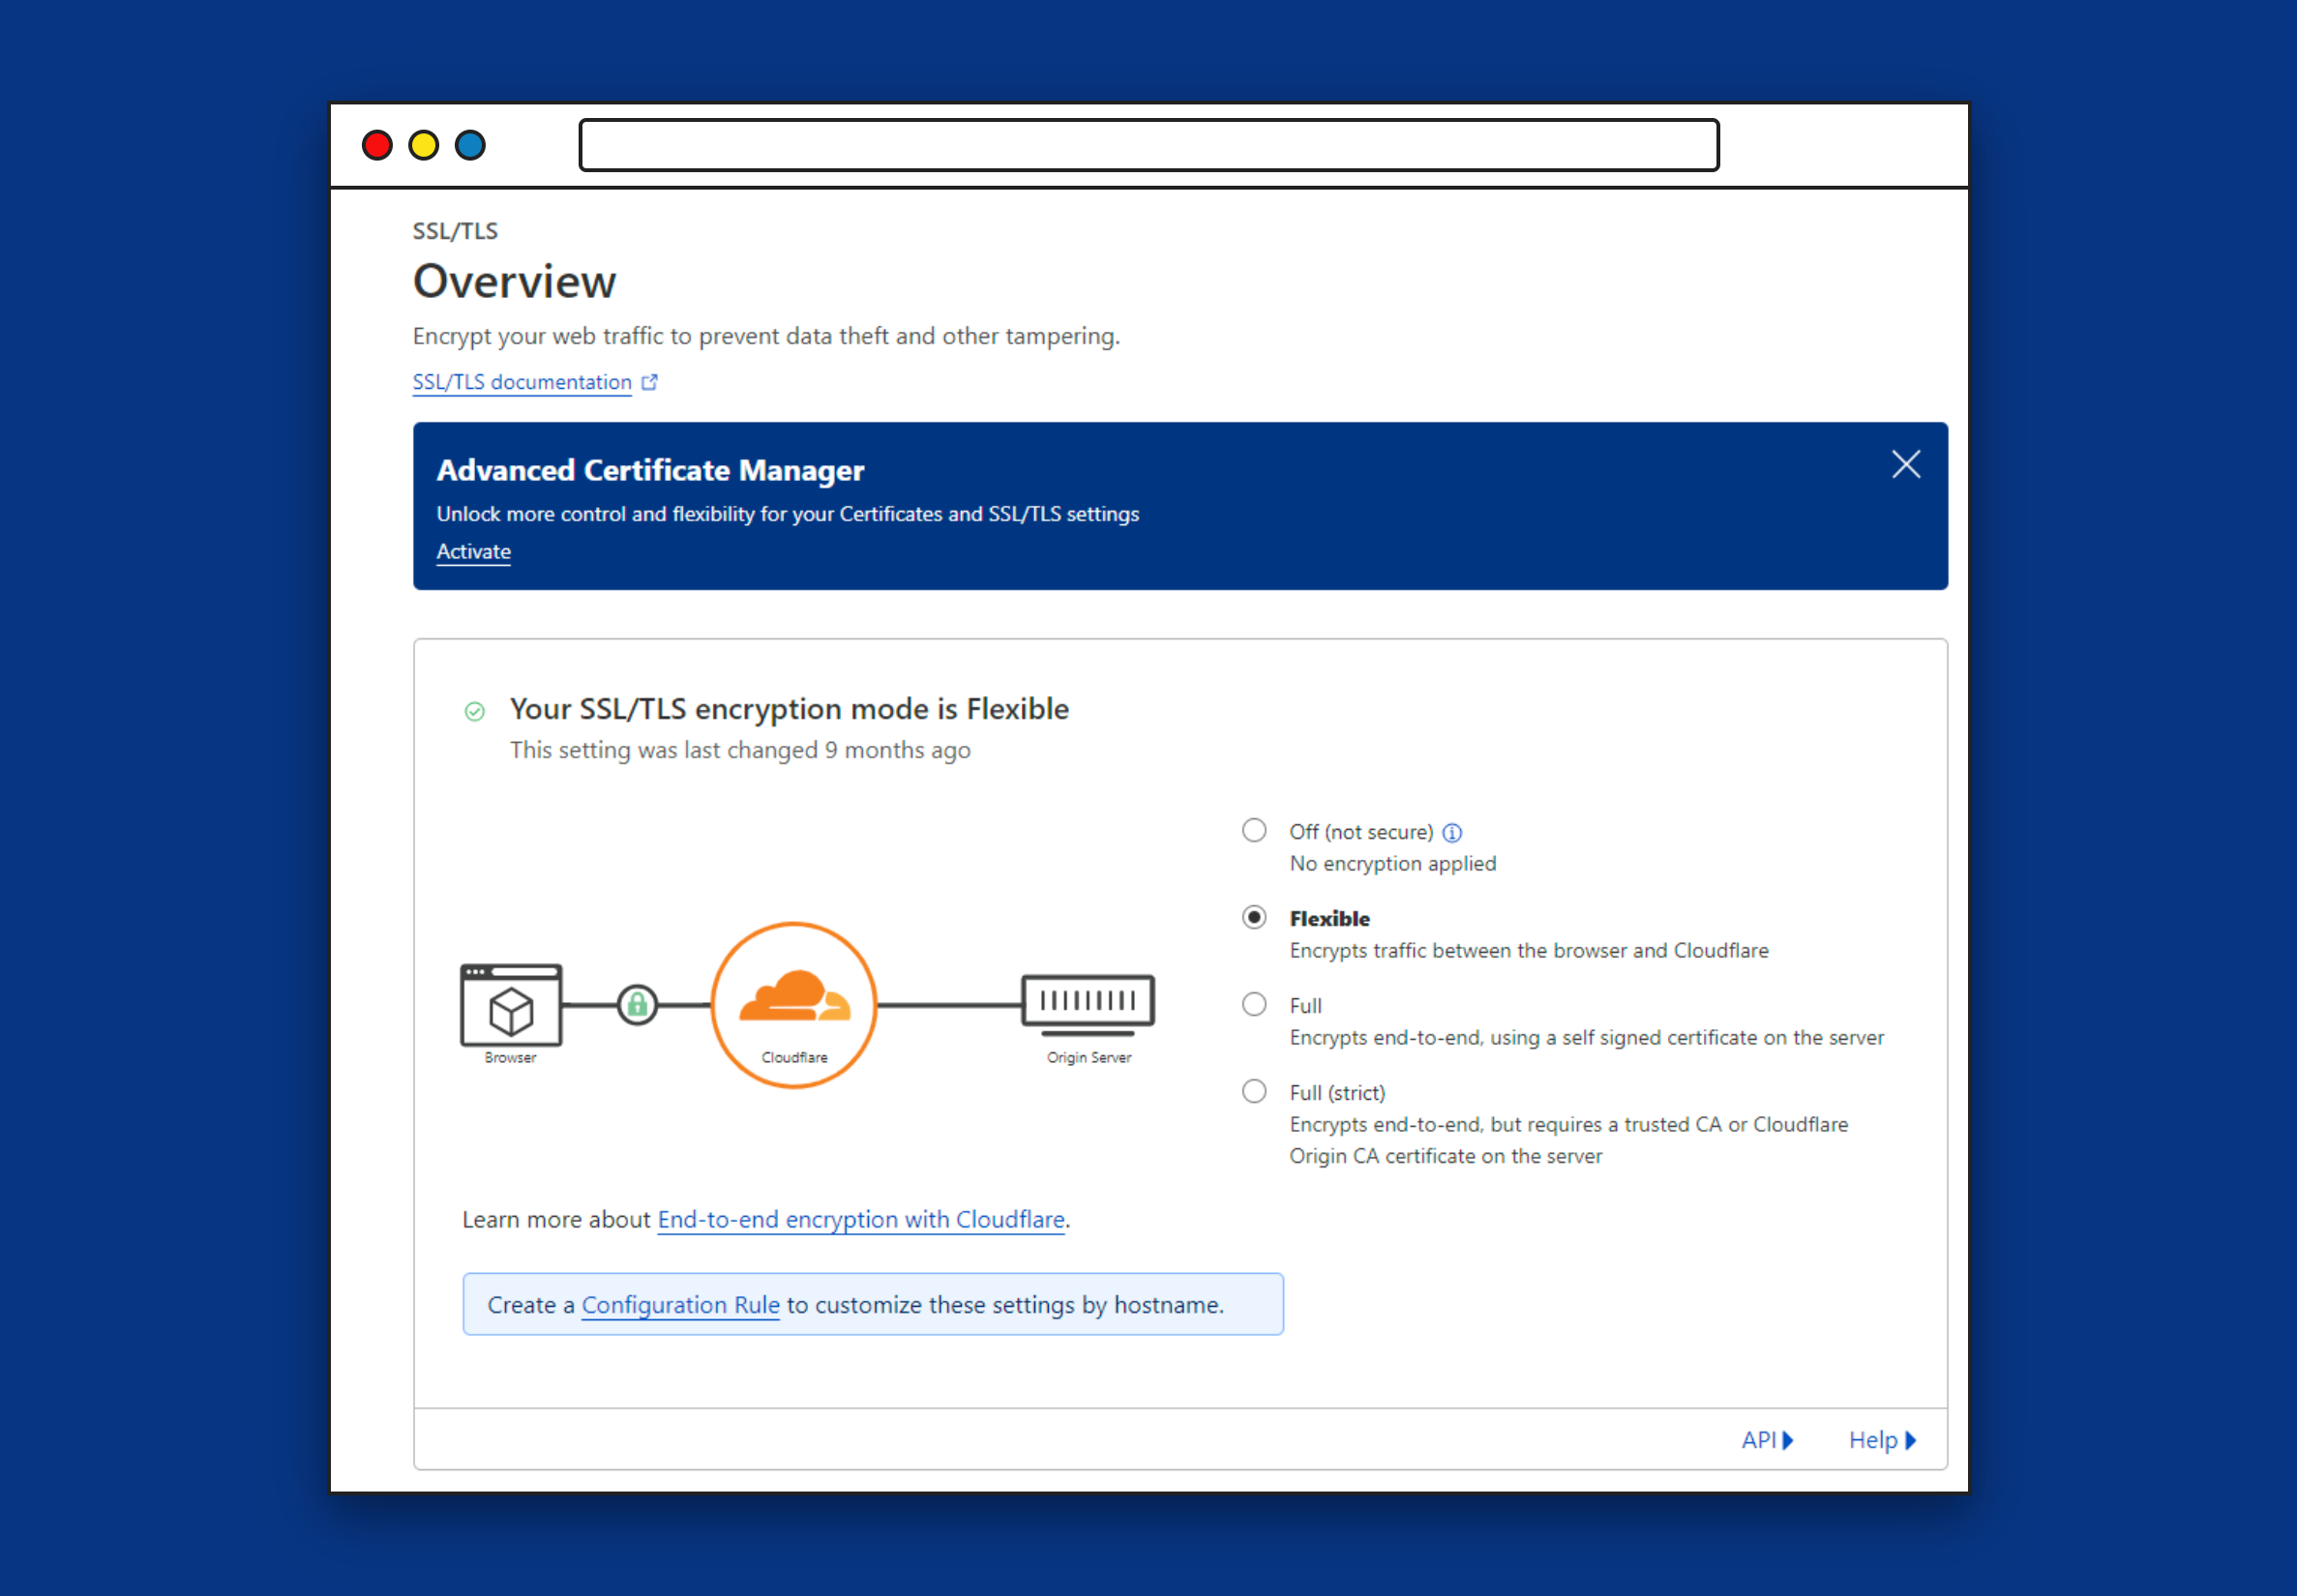
Options 1: Install Cloudflare for SSL Certificate
- Add your domain to Cloudflare;
- Update DNS records to point to your server IP;
- Enable Cloudflare Proxy (orange cloud icon);
- Configure SSL/TLS settings to "Flexible" or "Full".
If you have your domain already configured with Cloudflare, you can enable the Cloudflare proxy for your DNS record that points to your server, and by enabling Flexible SSL Configuration, your visitor can access with an SSL certificate provided by Cloudflare without the requirement to install on your machine a new SSL certificate.
Option 2: Add a SSL Certificate
Keeping Nginx separate from Drupal makes it easier to change Nginx configuration without affecting the Drupal application.
These are the steps to configure a SSL certificate in nginx:
- Generate an SSL Certificate with Let’s Encrypt ( skip if you already have )
- Create a cert folder inside nginx
- Mount your cert folder into docker-compose inside the nginx folder.
- Add in nginx.conf the following configuration
- Restart your nginx instance and check if the configuration is correct
Docker configuration
The Nginx configuration uploaded in GitHub already includes a SSL version that can be used, according to the readme.
  web:
    image: nginx:latest
    ports:
      - 80:80
    volumes:
      - ./:/var/www/html
      - ./nginx/nginx.conf:/etc/nginx/nginx.conf
      - ./logs/nginx:/var/log/nginx
      # - ./ssl-certificates/YOURWEBSITE.org:/etc/letsencrypt/live/YOURWEBSITE.org:ro
      # - ./ssl-certificates/www.YOURWEBSITE.org:/etc/letsencrypt/live/www.YOURWEBSITE.org:ro
    depends_on:
      - drupal
Nginx configuration
server {
    listen 443 <domain_name> ssl http2;
    [...]
    ssl_certificate /etc/nginx/certs/certificate.crt
    ssl_certificate_key /etc/nginx/certs/certificate_key.key;
    [...]
 }
Conclusion
This comprehensive Drupal Docker Nginx setup aims to provide a robust, scalable, and production-ready solution for your business applications that we are already applying to different customers of Geonovation.
The containerized approach avoids headaches in setting up servers and long configurations that can change according to the server type.
Key benefits of this setup:
- Performance: Nginx + PHP-FPM delivers excellent performance;
- Scalability: Easy horizontal scaling with Docker;
- Security: Multiple layers of security configuration;
- Maintainability: Clean separation of concerns;
- Cost-Effective: Efficient resource utilization;
Whether you're deploying a simple corporate website or a complex multi-site platform, this configuration provides a starting point for your deployment.
For additional support and advanced configurations, visit the GitHub repository or reach out to our development team.